Build your own raingauge and install it at a suitable location!
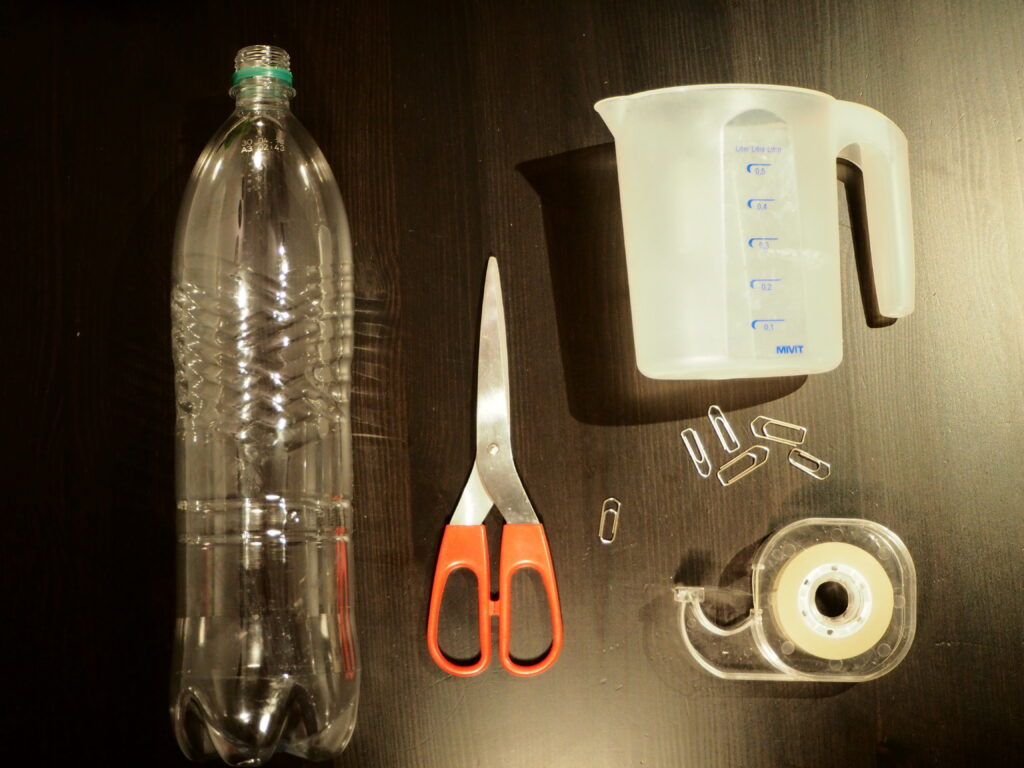
Materials needed
- 1 PET bottle, 1.5 liters with straight sides
- Scissors
- Duck tape/ paper clips
- Measuring glass
- Phone or camera
Building instructions
Cut the upper part of the 1.5 l PET bottle. Choose a point where the bottle has a consistent diameter (about 10 cm from the top, see image below). Watch out for sharp edges! We do not take any responsibility for injuries that might occur from constructing the raingauge or conducting the measurements.
Take the upper part that you cut off and place it upside down in the bottom part of the bottle, so it acts as a funnel (see image).
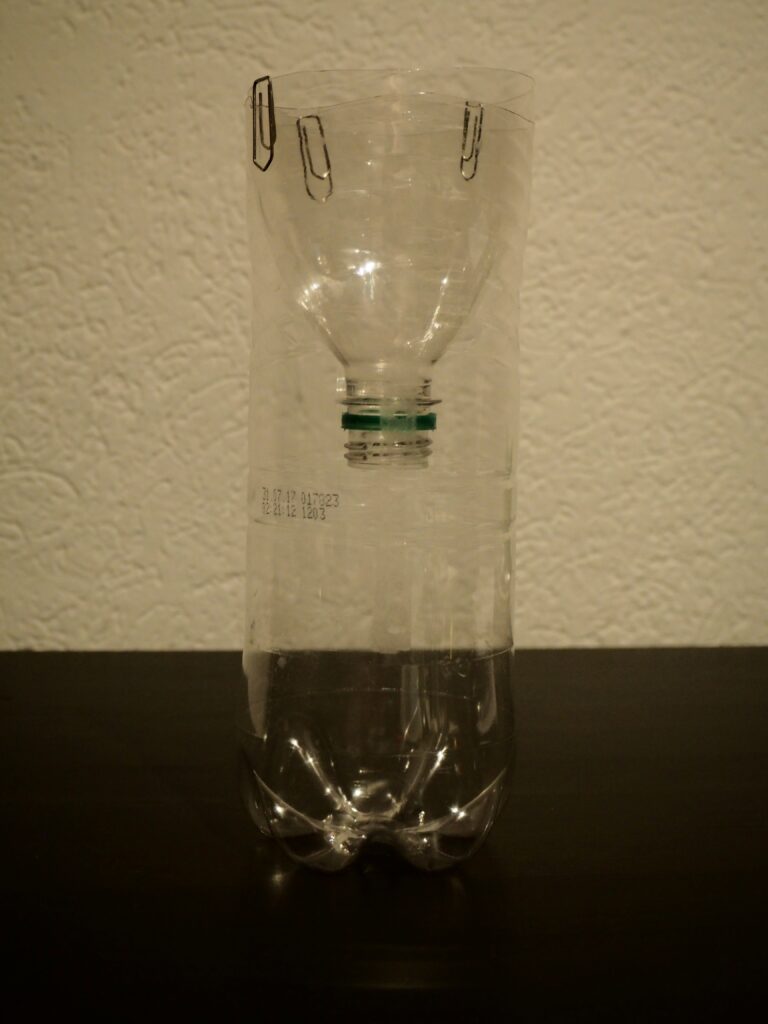
Fix the upper part with some tape or paper clips. But keep in mind that you need to be able to remove the upper part to conduct a measurement.
Placement of the raingauge
Now place your raingauge outdoors. Look out for a location without sheltering from buildings or trees to avoid them influencing your measurement. Fix the raingauge, so it wont get blown away by wind (you may dig a hole in the ground and place it there or fix it with some wood or stones – be creative!) If you don’t have a garden or a anything similar, fix the raingauge at the rail of your balcony or outside your window.
Measure the amount of rain water daily and if possible always at the same time.
Measurement
In case it rained, remove the funnel and pour the water into the measuring glass.
Measure how many mililiters (ml) it rained since you last measured. In case you don’t have a measuring glass, measure the water weight of the water with a kitchen scale and convert the weight into mililiters (1g = 1ml). Don’t forget to subtract the weight of the empty bottle.
Set up the your measurement location in the Anecdata App
Note: only do the following steps when you have data of a first measurement.
- Download and install the Anecdata.org app.
- Open up the Anecdata App and register.
- Search for the “CrowdWater Raingauge” project:
- Request Access and wait for admin approval.
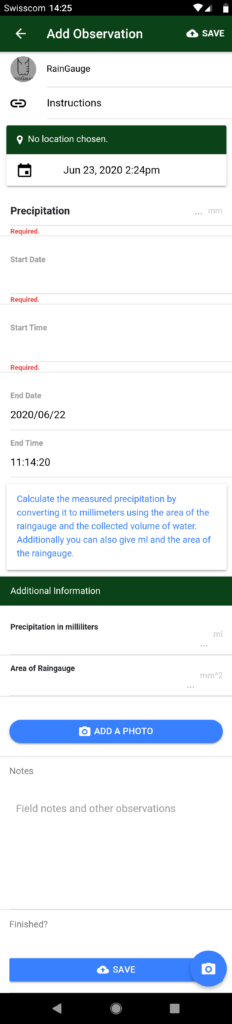
- Once admitted to the project click “add observation”.
- Click on the green bar where it says “No location chosen”
- Select the location of your raingauge and set up the “hotspot”.
- Add the first measurement with the info given in the section below.
Adding new measurements
These are the required data for adding a new measurement:
For the location select your existing spot from the map. (Click the green “No locations chosen”-bar).
- Amount of rain in ml
- Start Date and start time of the measurement (time when you last emptied the raingauge)
- End date and end time of measurement (time you emptied the raingauge, default is “now”)
- precipitation amount in ml (optional)
- area of raingauge (optional)
- Image of your measurement (optional, but please upload one at your first observation)